In this video tutorial you will learn how to make a cursor tracker in Elementor and WordPress by using also a third plugin called Dynamicooo. This cursor tracker trend is easy to make and you can customize it as you want without coding.
✨ Plugins used:
Elementor Free: https://bit.ly/elementor-xdu
Elementor PRO: https://bit.ly/elementorpro-xdu
Dynamicooo: https://bit.ly/dynamicooo-xdu
Create your Cursor Tracker
Hi everyone I’m Aryan and welcome to this new video tutorial today we’re going to create a cursor tracker for your website using Elementor, Elementor pro and Dynamic.ooo you will find everything in the description of this video.

I’m going to use a free theme called: Hello theme.

Let’s start! I have already a little page here and I’m going to edit this with Elementor here we are and go on the bottom of the page click on this plus button, here click on the first structure and then you just need to click on the little plus button.

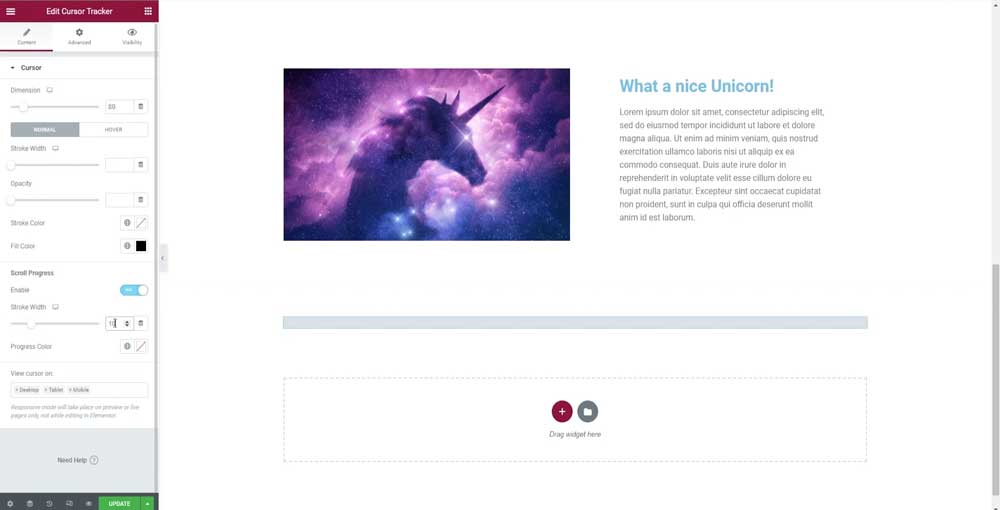
Great now we can search our widget and search for cursor tracker, drag and drop it here and as you can see on the left you have all your settings and my cursor tracker now is working fine, so let’s change the dimension of it to 80 so it’s bigger now and then I’m going also to change the fill color to black so you can see it well nice you can change the stroke opacity and whatever as you can see we have also scroll progress.

I will show you right away how it works, just choose a stroke width and I’m going to add a 10 and the progress color will be green.
Nice now if I scroll on the top of the page look what happens the bar changed and this is pretty cool! Now let’s say I want a mouse over effect on this button here so I need to click here on the left side and click on hover and as you can see there is a little class here cursor-target for your elements and I’m going to copy, then select the element you want to apply the effect, in my case the click here button and then go on advanced and CSS classes I will paste the code here.

Great now I’m going back to my cursor tracker settings click on this again and now if I click on hover and then change those settings here like opacity I will set to 0.1 and then scale I will set it to let’s say 5.55.

What happens if I mouse hover the button? normally should change but it’s not changing, This is because we need to update the page and refresh it so I’m going to update this and refresh the page.
Great and now if I mouse over to check it out it changes, cool right? If I scroll we have the green bar so everything is working fine if you want to do this for an image for another text you just need to select the image and then go on advanced and paste again the code cursor-target of course, nothing happens because you need to update the page and then refresh the whole page again, and now if I mouse over on my image this changes!
Nice let’s style a little bit better our cursor tracker now, so let’s go to the bottom click on this gray bar and then I’m going to change the dimension of my little dot I’m going to have a little dot like this and then I will disable the scroll (not a big fan of it) and as you can see now it changes.
All right guys if the tutorial was useful please hit the like button, subscribe to the youtube channel and notification bell, this will allow me to keep alive my youtube channel, and of course you’ll be notified when I get a new tutorial out so have fun and see you in the next one bye!